Some quick background before we begin
When we started Andekan nearly a decade ago, the vast majority of our customers were architects and engineers who needed Revit content for specific projects. Things have changed quite a bit since then, and today most of our customers are manufacturers who want Revit families of their products to distribute to those same architects, engineers and contractors.
While building product manufacturers are increasingly alert to the importance of having their products in Revit, most still remain in the dark as to what they should be looking for from their content. We regularly field inquiries from manufacturers who have paid handsomely for content from other providers that’s woefully inadequate if not unusable, or who know they need content but have only a vague idea as to what that means.
We wanted to create this primer as a resource for manufacturers seeking quality Revit content. Our aim is to help shed light on questions of how to evaluate potential content partners and how to determine if your Revit content will be satisfactory for use in actual projects (as opposed to in a content provider’s demo).
The list below covers 10 key aspects of Revit families that we at Andekan think about whenever we’re defining specifications for a content project. While the list is not exhaustive in terms of how you can specify Revit content, it should be sufficiently comprehensive for manufacturers buying content to get a solid grasp of whether they’re getting what they pay for.
Of course there are other ingredients that go into high-quality Revit content development, such as clear product documentation and good model QA. But those are beasts of a somewhat different nature and substantial topics in their own right that deserve their own posts or primers. So without further ado, here are our…
10 Key Specs for Revit Content
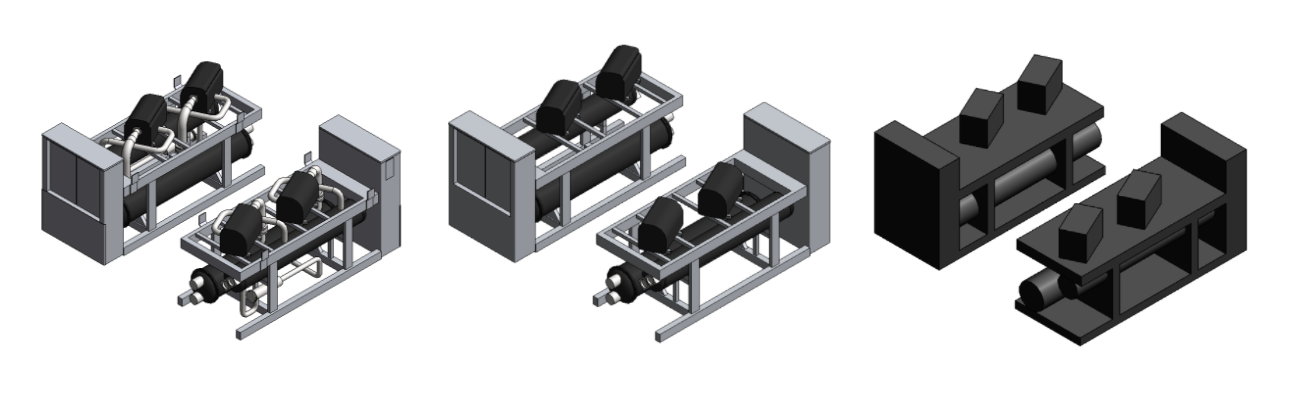
#1 3D Geometry – Keep it clean and use all levels.

3D is the one thing that anybody seeking and making Revit content is likely to know about – Revit can do 3D! But the devil is in the details, and there are some key ones for manufacturers to be aware of:
Levels of Detail. 3D geometry can be defined at three levels.
Revit offers three levels of detail for viewing 3D geometry: Fine, Medium and Coarse. Your Revit families should make use of all three. Fine geometry should be detailed enough that you can tell it’s your product, or at least tell the exact kind of product (some product categories are more generic-looking than others). Coarse geometry should just show the geometrical mass, since it will be used for simplified views. Medium, as the name suggests, should be somewhere in between those two, with the appropriate amount of detail being different for different product categories.
Logos and Branding. Not helping your image.
Logos and other pure branding elements are to be avoided, as they only add to the model’s complexity, file size and constraints, without serving any purpose within Revit. Adding them might quell the fears of your sales and marketing team, but not the needs of your customers working in Revit. In fact, any logo included on a Revit family will end up looking like nothing more than a blob or dot at most view scales needed for project deliverables.
Your brand will come through in other ways – parameter data, fine-level geometry that looks like your product, how you distribute your content to customers, etc. Most of all, it will come through in having high-quality content that makes customers happy by helping them to deliver great projects in Revit. Now this rule does have some exceptions. For example, creating a Revit family for a sign that goes on a restaurant or store is a case where modeling a logo simply can’t be avoided. 😉

Native Geometry. The sustainable approach to creating content.
Importing geometry from other formats is a killer for Revit content. Just don’t do it. Ever. This probably deserves its own post to explain, but while we work on that please just trust us and stick to using Revit’s native geometry.
#2 2D Geometry – Revit also does 2D. Don’t skip it.
Surprise! Revit also has 2D geometry elements: model lines, symbolic lines and masking regions. While Revit’s 3D geometry gets all the attention, it’s very important to consider 2D geometry for application in the drawings and sheets that are issued during design and construction.
2D or Not 2D? That is NOT the question.
For cleaner and faster 2D views, such as plans and elevations, your families should include 2D geometry applied specifically to those views. Any professional content provider worth its salt will include 2D geometry as a matter of standard practice. Some will argue that Revit’s view rendering, and computers in general, have improved enough over the years that it’s entirely possible to skip 2D geometry and just use 3D geometry in 2D views. They might be right, at least for certain types of families, and that can be a perfectly acceptable choice at a firm or project level. But when it comes to making Revit content for public consumption, it’s important and worthwhile to cover your bases and include 2D geometry for 2D views. Having good 2D geometry is one of those details that an end-user will really appreciate about good content and which will help keep them using your families in projects.
Levels of Detail, Again. 2D also shows in three levels.
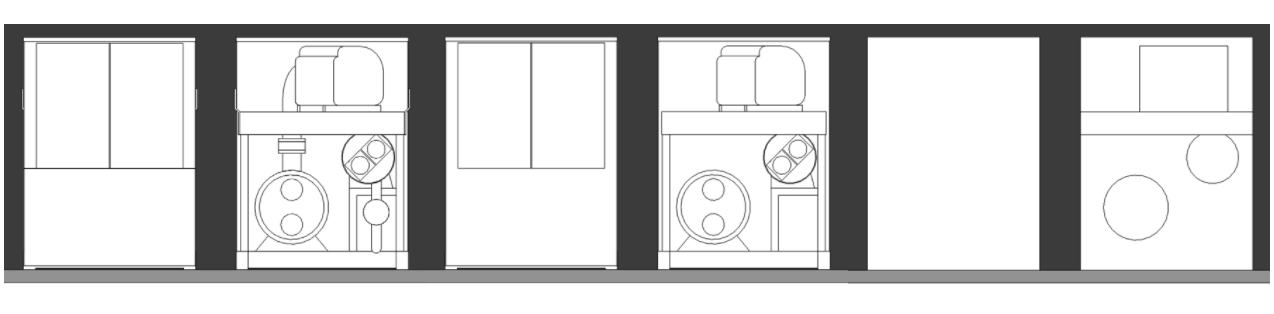
Just like with 3D geometry, Revit gives you Fine, Medium and Coarse levels of detail for 2D geometry. In general, you should follow the same principles as with 3D geometry, although certain product categories have special requirements based on industry practice for construction documents. For example, pipe fittings should display as model lines only, and light fixtures should display as symbols. Speaking of symbols…
Symbols. Create separately and then nest.
If you need your product to be represented by a symbol in plan or elevation views, then you should create the symbol as a separate Annotation Symbol family and nest it within your main family. And don’t let anyone tell you that a symbol won’t show if your product is placed in a wall, or that you can’t avoid overlapping with symbols from other objects placed in the same space.
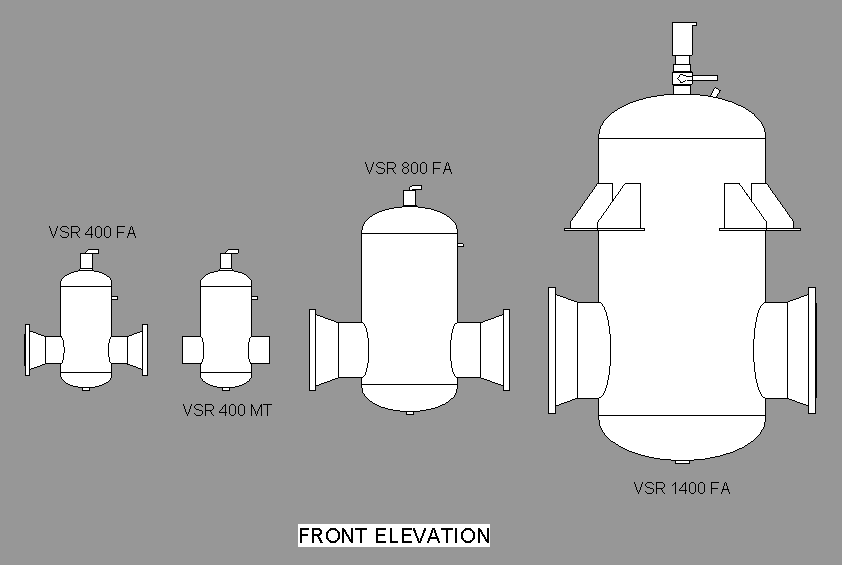
#3 Flexibility – Make sure your content can adapt.
The bad news is that product dimensions and exterior appearance usually change over time, and when they do you’ll have to update your content. The good news is that your Revit families can be built to handle this eventuality with relative ease. One of Revit’s key features is the ability to create “flexible” geometry, i.e. you can enter new dimensions and the model geometry will automatically “flex” to the new size or shape. The more flexible a family’s geometry is, the easier it will be to incorporate future changes, and the more likely that a manufacturer can make those changes without outside help.
It’s also possible to create Revit families with non-flexible geometry, and sadly there are still cases of manufacturers paying for fancy-looking models that break as soon as they try to change a dimension. While it’s true that, for very specific products, non-flexible families are not necessarily a bad thing in Revit, there are still reasons for a manufacturer to keep geometry flexible. Documentation might have mistakes, and a flexible family will more easily cope with such changes at little or no cost. Additional variations of products developed in the future will be able to use a flexible family as a starting point. And for certain kinds of products, say pipe fittings, you want to go the extra length and have geometry that can flex to a whole range of sizes and angles so that the family supports the required workflow in Revit projects.
#4 Types – Define your major product variations.
Types represent different variations of a product or object within a single Revit family – which is why it’s called a “family”. For example, a table that comes in red or blue and 8ft or 12ft could have four types to cover the different length and color combinations that someone might order.

Not every product option needs to be covered by a type, and we’ll talk more about other kinds of options below. But every family in Revit will always have at least one type by default. For manufacturer Revit content, there are two key points we always try to bear in mind regarding types:
Define types by your most common, standardized versions.
Types should be used to cover a product’s most common and standardized options. In general, your Revit family types will match up to the different models of your product that you sell. For example, if you sell a lamp with either a circular shade or an elliptical shade, it would make sense to set those options as types within your lamp family. On the other hand, if your lamp is available in any length from 4ft to 8ft, it doesn’t make sense to cover that option using types because there is an open range of possible values. There are also some options that are not possible to cover using types, such as optional electrical connections.
Type catalogs make everything easier.
Types are most convenient when defined using what’s called a type catalog in Revit. This is especially true if there are more than just a few types. The reason is that a type catalog is essentially a spreadsheet, which can be edited and reviewed just like a spreadsheet, i.e. by anyone and without having Revit. So the more information that is fed from a type catalog, the more manageable the family will be for the manufacturer (and for the end user).
On the other hand, we’ve received plenty of requests from manufacturers to update families that use a whole series of complex, interconnected formula parameters to generate all of the type data. Any family created in this fashion takes what should be simple and turns it into something which can’t be updated in a reasonable amount of time, except, perhaps, by the original content provider. In contrast, if you had a properly-built, flexible family that uses a type catalog, you wouldn’t even need to open the Revit family file. Instead, you could take care of any changes purely within the .txt type catalog.
#5 Parameters – It’s all about the data!
If geometry is one side of the Revit content coin, then parameter data is the other side. Parameters are what define your product’s properties within Revit. Parameters can include everything from physical attributes like width, length and height, to technical specs like materials, weight, electrical or mechanical properties, to identifying information like model number, product URL and, you guessed it, manufacturer. You can add and configure custom parameters for your Revit content, and there are also some built-in parameters that come with the Revit family templates.
A quick compass for navigating the sea of parameters
It would take many blog posts to cover the topic of parameters, and there are many technicalities that apply only to specific types of products or project use cases. For a manufacturer’s purposes, below are some of the most critical things to look out for on your Revit journey.

Family Category. What kind of object is it?
Categories in Revit cover major groups of building objects like Communication Devices, Doors, Furniture, Mechanical Equipment, Pipe Fittings, Plumbing Fixtures, Windows and so on. Setting the Category parameter for your family is important. Certain categories come with different built-in parameters that are essential for their use in Revit. The Category parameter is also something that’s frequently used for generating schedules of quantities in Revit, and you want to make sure that your product shows up on the right schedules.
Type vs. Instance. Think “factory set” vs. “on site”.
Parameters in a Revit family can be configured as either “type” or “instance”. The easiest way to think about type parameters is as being for those attributes that define your product and are set at the factory. For example, think of a valve’s “connection type” parameter. If it’s a threaded valve, then it’s so from the moment it leaves the factory and it won’t or shouldn’t change once on site. So that’s a type parameter.
On the other hand, instance parameters should be used for any parameters that need to be in a family but that could or should be changed on site. The lever of that valve can be open or closed, but that’s something that can and should be changed on site, and it doesn’t change which threaded valve you ordered. So the parameter used to set the lever of the valve to open or closed would be an instance parameter.
Naming and Grouping. There to help users, not content creators.
Parameters can be positioned under different group labels within a family and can be named however you want. Usually, you just want to follow the logical groupings that you get in Revit, so that you put your electrical values in the Electrical group and the outer dimensions under Dimensions. But we also recommend putting “background” parameters (ones that are used for special options or as part of formulas) into the Other category so that they stay out of the way for users and anyone marketing the content.
In terms of parameter naming, clear and concise is always the best approach, especially with those that will need to be used in a project. Make sure they can be easily understood by your customers and users. Autodesk’s own out-of-the-box content takes this approach, with plain English labels that use Title Case for Their Words. Leave any clever formatting like CamelCase, lots_of_underscores or ACME_Prefixes, where it belongs, in the hands of any customers who are so inclined to use them.
Formula-Driven Parameters. Don’t get carried away.
Parameter values can be defined using a formula, and those formulas can reference other parameters, and thus many complicated things can be achieved using formula parameters in Revit. It’s hard to avoid using any formula parameters if you want to do something fancy with a Revit family’s geometry or parameter values. On the other hand, the more functionality that you pack into formula parameters, the harder it becomes to manage a family over time. Even if all the individual formulas are simple, you are also adding logic that will need to be understood, modified and re-checked any time you need to make a change. And if your families use formula parameters to generate type values, then you’re highly encouraged to go back and read section 4 on the virtues of type catalogs.
Shared Parameters. As few as possible helps everyone.
If you’re building in-house content for an AEC design firm, then by all means you should include the firm’s shared parameters in your Revit content. On the other hand, shared parameters are generally a bad idea for manufacturers developing content for public distribution. Why? Because AEC firms don’t all use the same shared parameters. Sure, there are some public lists of shared parameters for different industry groups that get some usage, and it can make sense to include those if you know that most of your customers are using them or have asked about them. On the other hand, having unwanted shared parameters is a pain for users, so leaving them out keeps your Revit families neat and tidy for everyone. Those that want to add their shared parameters can still do so, and in general that process is one they’ll likely have developed to be easy and efficient.
#6 Options – Include, Split or Skip?
It’s always critical to account for any options that need to be available for the end-user in Revit. These could be mounting options, accessory options, technical options, etc. The way that options get incorporated into your Revit content will vary depending on the nature of the option and how commonly it’s used. But in many cases, such as with clearance zones described below, you can configure a checkbox parameter to toggle options on and off by linking either to your model’s geometry or to other parameter data.
In other cases, you may end up going so far as to create a separate version of a Revit model to cover a desired option. This could either be because Revit requires it (e.g. a motor accessory that brings with it an additional power connection – see below for more on connectors) or because it’s just more practical for the end user (e.g. your product has an option that’s required for use in a certain commercial or geographic market and is never used in any others).
There are also cases where it will make the most sense to NOT cover an option within the Revit family. Maybe the option is so rarely needed that you don’t want to confuse users, or maybe it’s something that must be customized per order, or maybe it simply wouldn’t be useful within the context of a Revit building project. In all of these cases, your content provider should be able to walk you through the possible approaches and clearly describe the pros and cons of each.
#7 Clearance Zones – Give your families their space.
Whether it’s for purposes of access, maintenance or safety, many types of building products require a certain amount of space around them. Since Revit is used heavily as a coordination tool, it’s critical to include these clearances in your Revit families. Clearances should be modeled in both 3D and 2D views, and you should be able to turn them on and off using a clearly named parameter. It’s best practice to assign clearance zone geometry to its own subcategory within the model, at least until the day Revit does the right thing and provides a built-in clearances subcategory.
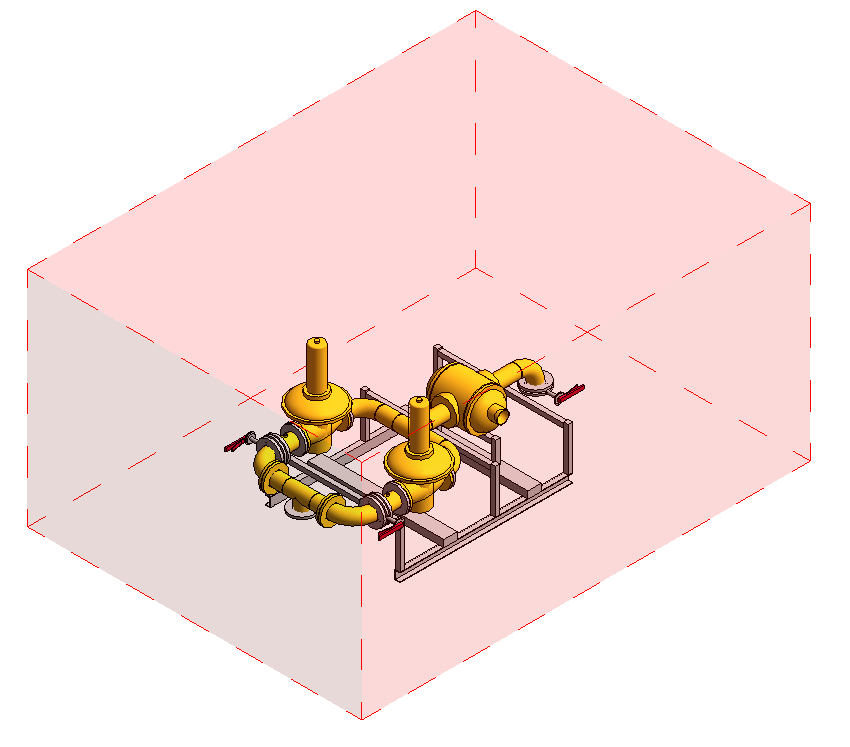
#8 Connectors – For MEP system parts and equipment.
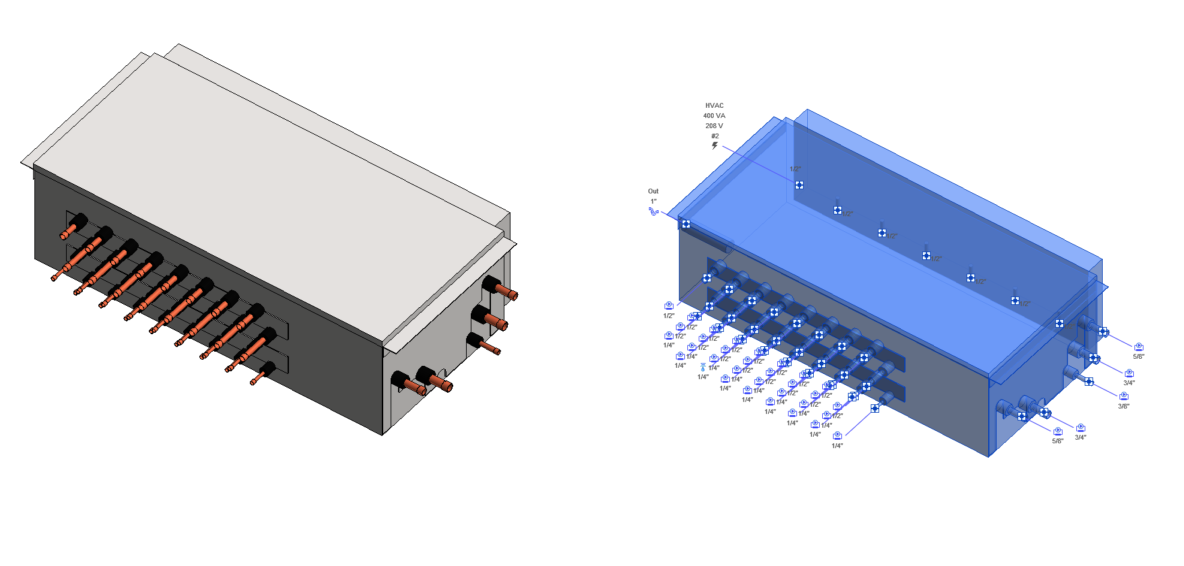
If your product makes use of, or is a part of, a building’s electrical, plumbing or HVAC systems, then your Revit family will need one or more system connectors. As the name implies, connectors allow a Revit family to become part of a building system so that its properties are taken into account for purposes of calculating loads and flows. Certain types of products will only need one connector (e.g. light fixture), whereas others will need multiple connectors of the same type (e.g. pipe fittings) or multiple connectors of different types (e.g. HVAC equipment).
Connectors have their own systems-related properties, which are not shown in the Revit family parameters that are readily visible to the end-user. However, some connector parameters can be linked to family parameters, which a user can readily select or modify. Linking connector parameters to family parameters gives users a way to easily set key system-related properties that they need for project usage (e.g. selecting the right voltage type).
Failing to include a connector in a model that should have one, or configuring connectors incorrectly, can negatively impact an entire project, so it’s very important to get them right for MEP manufacturers. It’s also important to be aware that system connectors have certain limitations in Revit. For example, if your product comes in variations with different numbers or types of system connections, then you’ll need to produce multiple Revit families to cover those varying connector options.
#9 Hosting – Where should I put this?
“Hosting” in Revit refers to how an object can be placed in a building space. Does it need to be placed on a face, in a wall, on a ceiling, or can it be placed anywhere (non-hosted)? Hosting is a critical choice, because once you pick your hosting type template for a Revit family, you can’t easily change it.
Aside from a small number of special cases such as windows or doors, you generally want to pick either non-hosted or face-based hosting. While there are more specific options available, like wall-hosted, ceiling-hosted and floor-hosted, more often than not those choices only serve to unnecessarily constrain a family’s usability within a project. There can be vertical and horizontal design faces in Revit that are not strictly categorized as walls or ceilings or floors in the project, so having a face-based family usually makes it easier to place “hosted” content where it ought to go. And anything that doesn’t actually affix or mount to a surface can simply be non-hosted. Again, there are cases where more specific hosting is appropriate, so it’s an important choice to ask about if you’re not sure what makes sense for your products.
#10 Version – If I could turn back time…Revit can’t.
Similar to hosting, this is a choice that can’t be reversed, so make sure you choose wisely. The key constraint with Revit versions is that content can never be downgraded to earlier versions, although it can always be upgraded to newer versions. So if you build your content in Revit 2016, then you should be okay NOT having it available in Revit 2015 and earlier.
There is always a tradeoff between making content that is backwards compatible, and therefore available to the largest possible number of users, and making content that takes advantage of the latest and greatest in Revit. Autodesk officially support the current version of Revit and three versions prior, so that’s a good reference for how far back most content ought to go. And remember, Autodesk generally release the next year’s version during the current year, i.e. Revit 2018 has been out since the spring.
However, if you know that a lot of your customers are still working in Revit 2013, for example, then it probably makes sense to go an extra year back and do the content in 2013 to make sure you can continue serving those customers. In certain cases, you may then need to tweak or want to optimize the content in later year versions (for example, embedding lookup tables in pipe fittings from Revit 2014 onward). But that effort will generally be minimal compared to rebuilding a family from scratch because it got made in a too-recent version.
#11 Project Workflow – btw don’t forget context.
We always want to go the extra mile for high-quality content, so of course we had to squeeze an 11th item into our top 10 list. But project workflow is less a single spec on a checklist and more a question of the “real-world” understanding that’s required to apply the checklist to different types of objects and products. It’s understanding how those objects need to get used within a Revit project (workflows), and the features and options that Revit has available for achieving those workflows.
To give an example, although we highlighted types and type catalogs in multiple places above, if someone ever gives you a pipe fitting Revit family that uses a type catalog or that has types for different angles (e.g. a bend with 45 degree type and 90 degree type), then you should run away from that person! That’s because pipe fittings use another special feature in Revit, called a lookup table, that lets them accommodate multiple angles within a single type.
So it’s essential to work with a content creator that has enough experience working in Revit projects to understand your product’s required workflows and how best to achieve them. At Andekan, on top of our 10 years dedicated to creating top-quality Revit content, our team has another 10 years combined experience working as coordinators and consultants for real-world building projects. Whoever you work with to create content, you should feel confident they have the experience to connect all of the technical dots in project context.
A quality content creator will be able to describe how your content will be used in a project and to explain which features and options are most important for your type of content. That can be someone in-house who has trained extensively in Revit and talked to all of your customers using Revit, or it could be a consultant who specializes in Revit and your particular industry sector and has design firm clients, or it could be a firm fully-dedicated to Revit content with years of experience doing content of all kinds for a range of customer types, like…hmm, let’s see…well, you get the picture.
That’s it! All done!
Thanks for reading our list of 10 Key Specs for Revit Content! If you’re a product manufacturer developing content, or if you’re a Revit user who works with product manufacturers and their content, we hope this primer has been helpful! If you have questions or feedback, please feel free to leave a comment here or reach out to us by email at contact@andekan.com.